


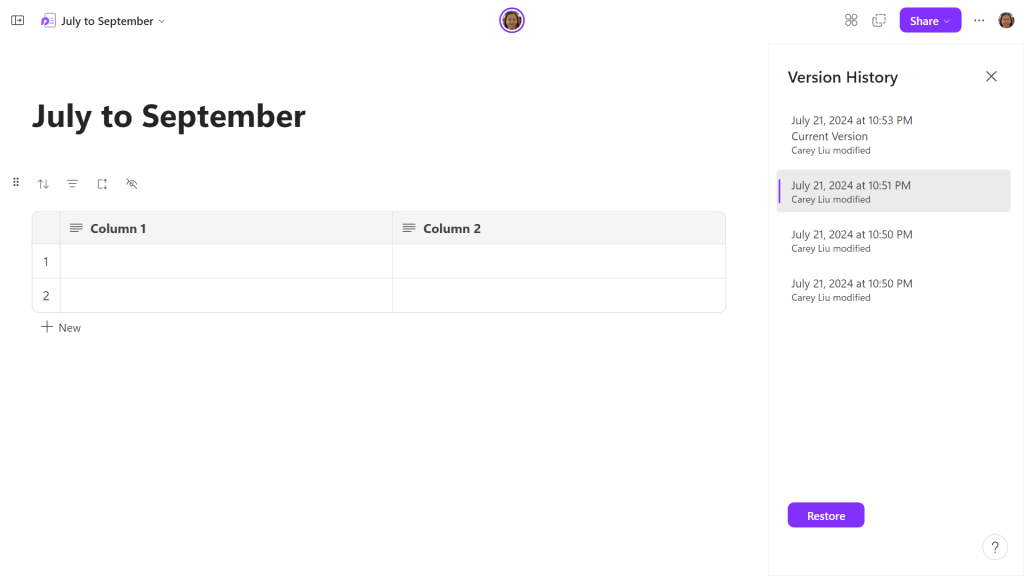
You can view and restore earlier versions of a page.

You can view and restore earlier versions of a page.
Howard Wen / IDG
You can view and restore earlier versions of a page.
Howard Wen / IDG
Howard Wen / IDG
Sharing a workspace or page
In the Loop app, you can invite others to collaborate with you on a workspace or an individual page. When you share a workspace, each person you invite can view and make changes to any page in that workspace. When you share a page, they’ll be able to view and edit only that one page.
Sharing a workspace
From any page that’s open in the main window: Click the Share button at the upper right. On the menu that opens, select Workspace.
From the Loop home page: Move the pointer over the workspace that you want to share. Click the three-dot icon that appears. On the menu that opens, click Members.
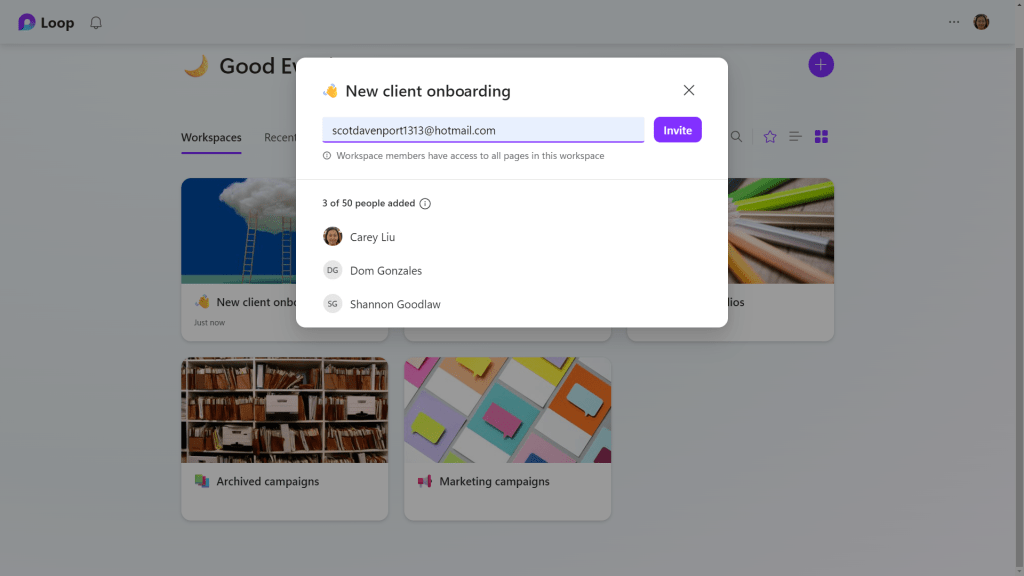
Inviting collaborators to your Loop workspace.

Inviting collaborators to your Loop workspace.
Howard Wen / IDG
Inviting collaborators to your Loop workspace.
Howard Wen / IDG
Howard Wen / IDG
Either way, a panel opens where you can type in the email addresses or names of people in your Microsoft account contacts. Do this and click the Invite button. They’ll be emailed a link inviting them to access your workspace.
Sharing a page
You can share a page that’s in a workspace or in your Ideas section in one of two ways:
- As a web link: When you or someone you invite clicks this link, the page opens in a web browser.
- As a Loop component: When you or someone you invite pastes this link inside a Microsoft 365 app that supports Loop components, the page is embedded in it.
You can share a page from Loop’s main window or from the sidebar along the left.
With the page open in the main window: To share the page as a web link, click the Share button at the upper right. On the menu that opens, select Page link. You can then paste this link into a chat, document, email, or other text-based app.
To share the page as a Loop component, either click the Share button and then Loop component or just click the dual-square icon to the left of the Share button. You can then paste this link into a Microsoft 365 app that lets you embed Loop components.
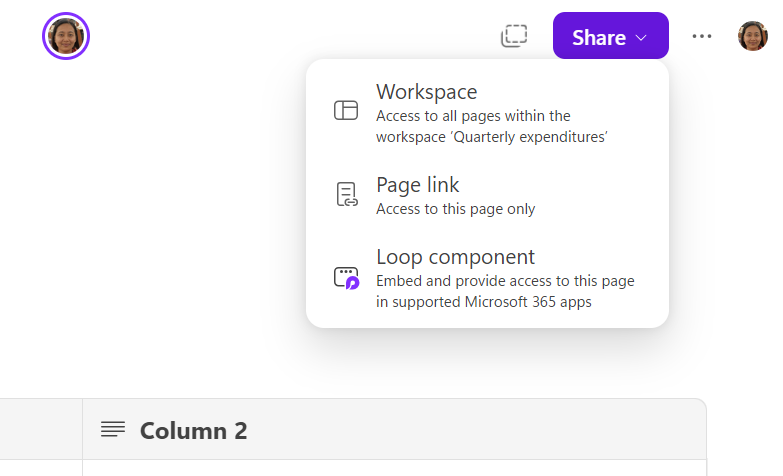
Sharing a page via the Share button.
Howard Wen / IDG
From the left sidebar: You can share a page without opening it in the main window. In the left sidebar, move the pointer over the page and click the three-dot icon that appears to its right. On the menu that opens, select Share page link or Share Loop component.
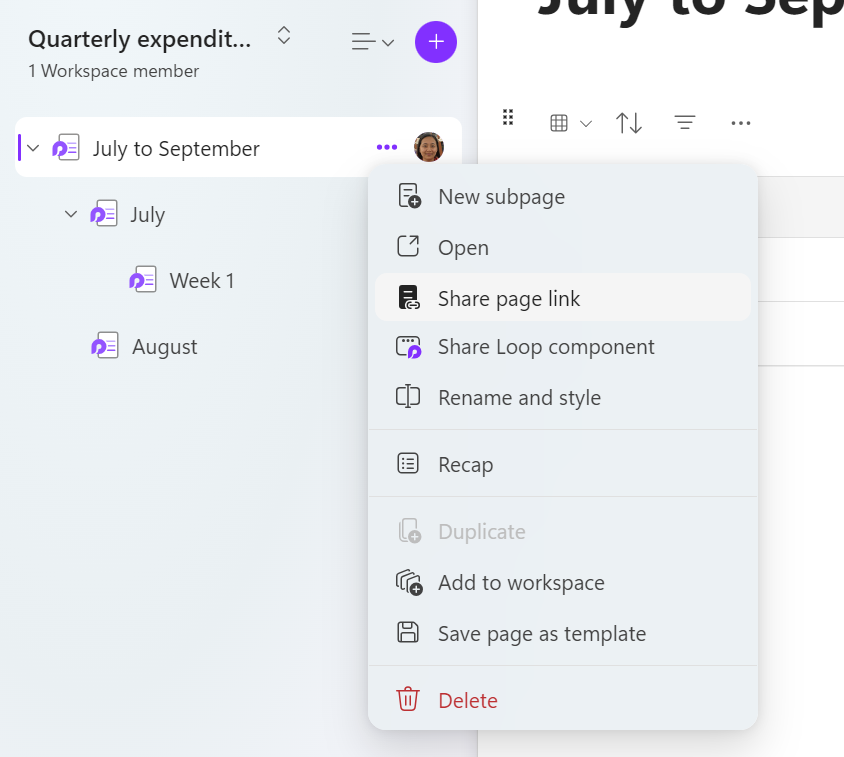
Sharing a page via the left sidebar.
Howard Wen / IDG
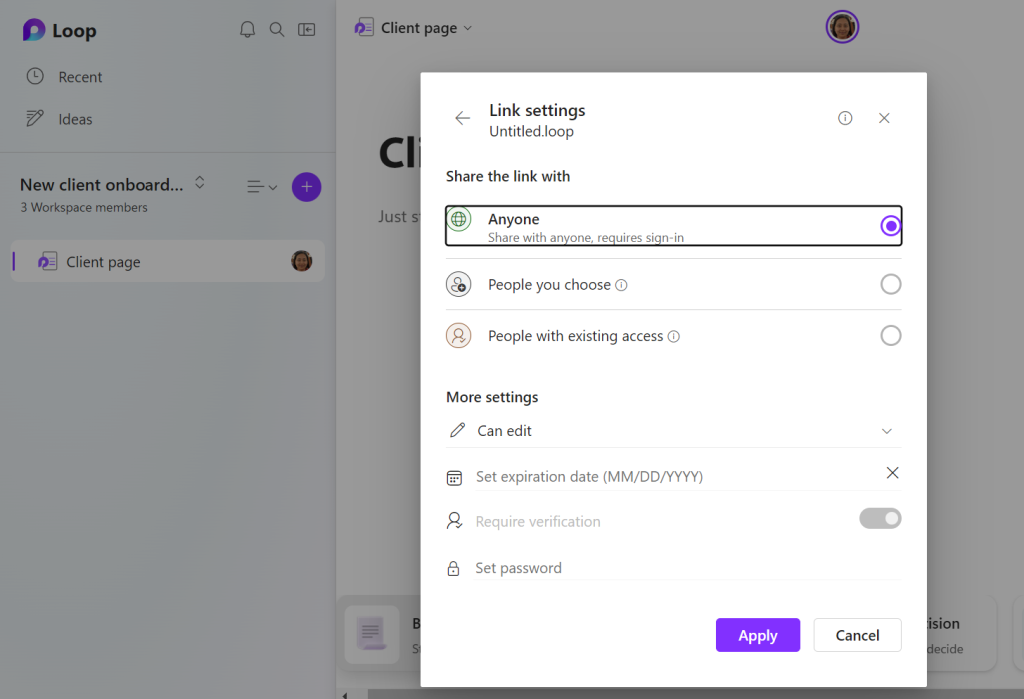
Change a page’s sharing permissions: By default, whoever has access to your page’s link or Loop component will be able to make changes to this page. You can change who has access and whether they can edit or only view the page.
On the panel that appears when you select Share > Page link or Share > Loop component, click Settings. This opens the “Link settings” panel.
Changing who has access to a page.

Changing who has access to a page.
Howard Wen / IDG
Changing who has access to a page.
Howard Wen / IDG
Howard Wen / IDG
Depending on the type of Microsoft 365 plan you have (and the user permissions set by your admin if you have a work subscription), you may see any of these options on this panel:
- Anyone
- People you choose
- People in [your organization]
- People with existing access
For example: if you select People you choose, you can enter email addresses or names of contacts you want to invite to collaborate on your page. “People with existing access” are those you’ve tagged in the page with the @ command.
To change permissions so that anyone with access to this page can only view it (and not edit it): Under “More settings,” click Can edit and change it to Can view.
Next, you can set an expiration date — the link will no longer work after a date that you select. And you can set a password. When someone clicks the web link to your page or pastes its Loop component link into a Microsoft 365 app, they’ll have to enter this password first.
After you make your selections, click the Apply button. A link to your page with these new settings will be generated and copied to your PC clipboard.
Managing your workspaces and pages
As you’re viewing a page in the main window, you can perform the following actions.
Create a new workspace: On the left sidebar, click the name of the workspace that you’re currently in. On the menu that opens, select New workspace.
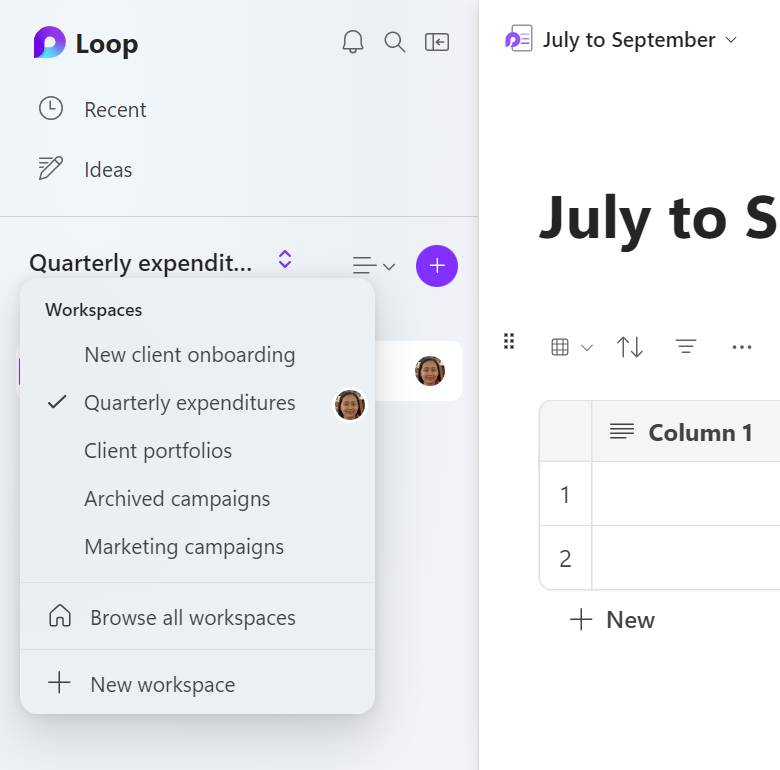
You can easily switch to another workspace or create a new one.
Howard Wen / IDG
Switch to another workspace: On the left sidebar, click the name of the workspace that you’re currently in. On the menu that opens, click the name of another workspace. Or select Browse all workspaces to go to the Loop home page, and select another workspace from there.
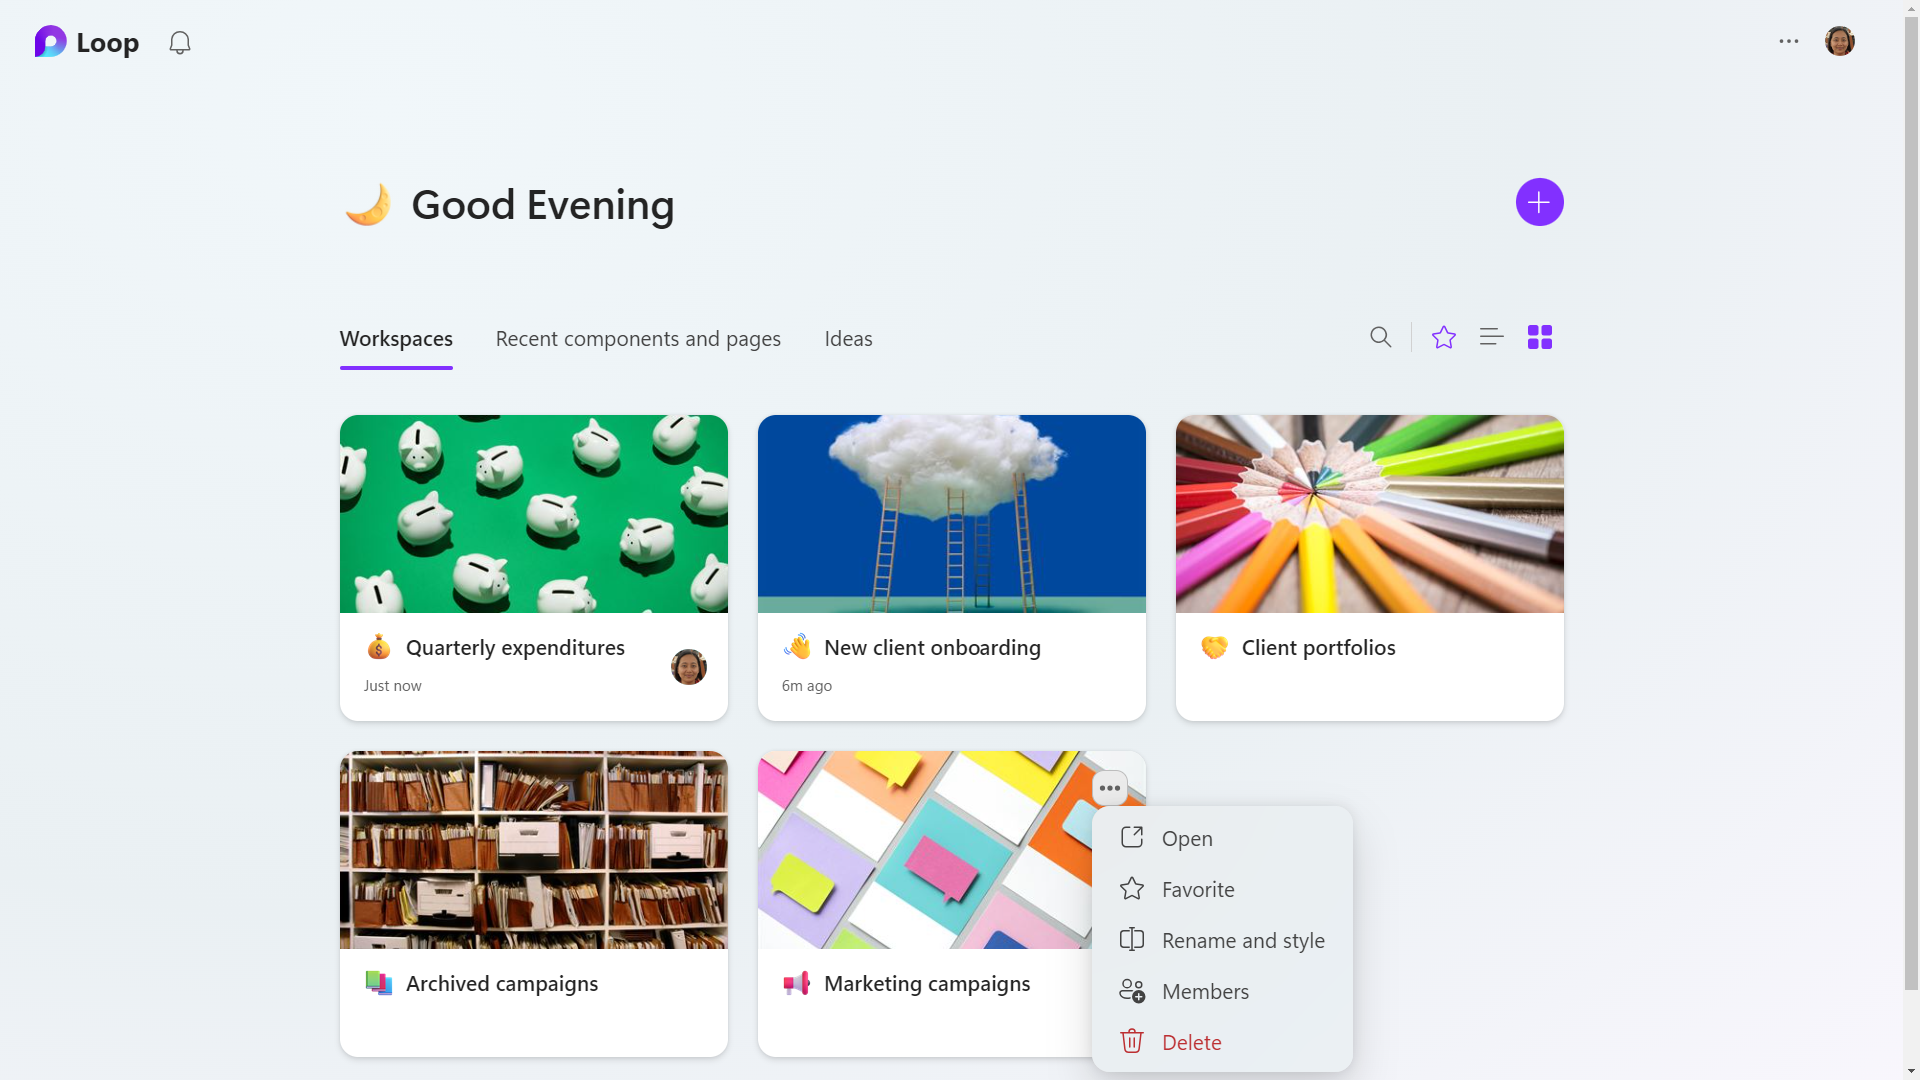
Rename or delete a workspace: On the upper left corner, click the Loop logo, which takes you to the Loop home page. Move the pointer over a workspace. Click the three-dot icon that appears. On the menu that opens, click Rename and style or Delete.

Click the three-dot icon for a workspace to take actions such as opening it, renaming it, or deleting it.
Click the three-dot icon for a workspace to take actions such as opening it, renaming it, or deleting it.
Howard Wen / IDG
Click the three-dot icon for a workspace to take actions such as opening it, renaming it, or deleting it.
Howard Wen / IDG
Howard Wen / IDG
Change the order of pages in a workspace: On the left sidebar, move the pointer over a page. Click-and-hold the page, drag it up or down, and let it go where you want it to be set in your list of pages.
Rename or delete a page: In the left sidebar, move the pointer over a page and click the three-dot icon that appears. On the menu that opens, click Rename and style or Delete.
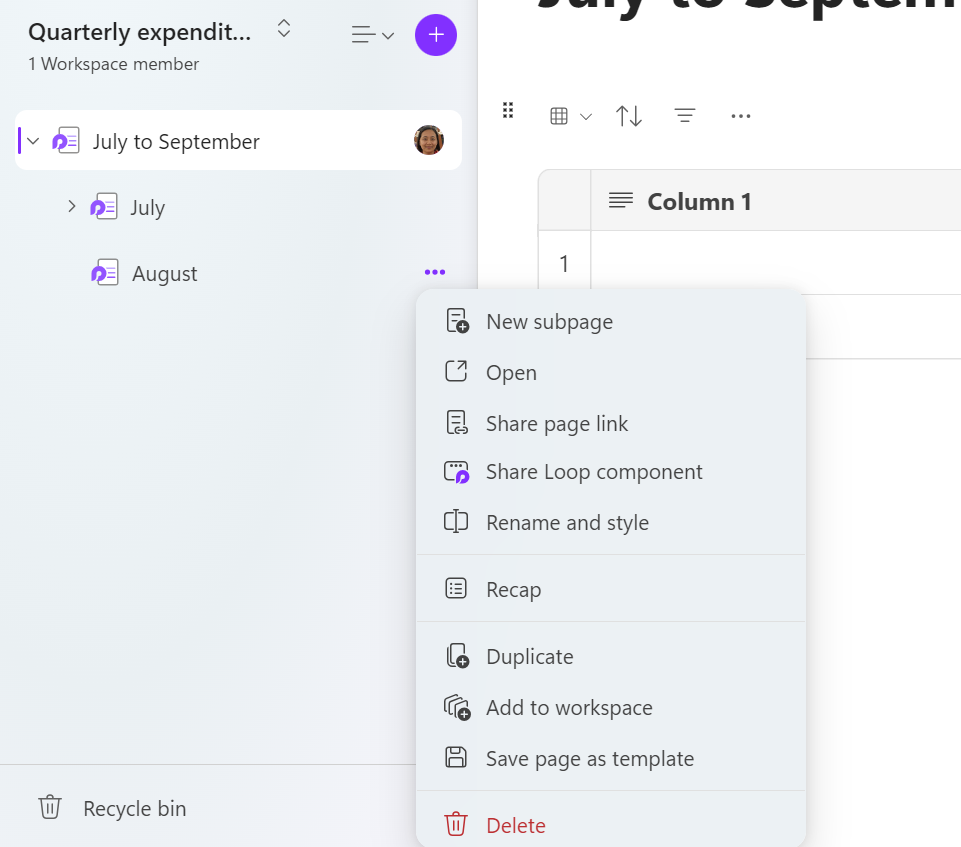
Several commands are available when you click the three-dot icon to the right of a page in the sidebar.
Howard Wen / IDG
Copy a page to another workspace: On the left sidebar, move the pointer over a page and click the three-dot icon that appears. On the menu that opens, click Add to workspace, then select the name of another workspace that you’ve already created. A copy of this page will be added to that workspace.
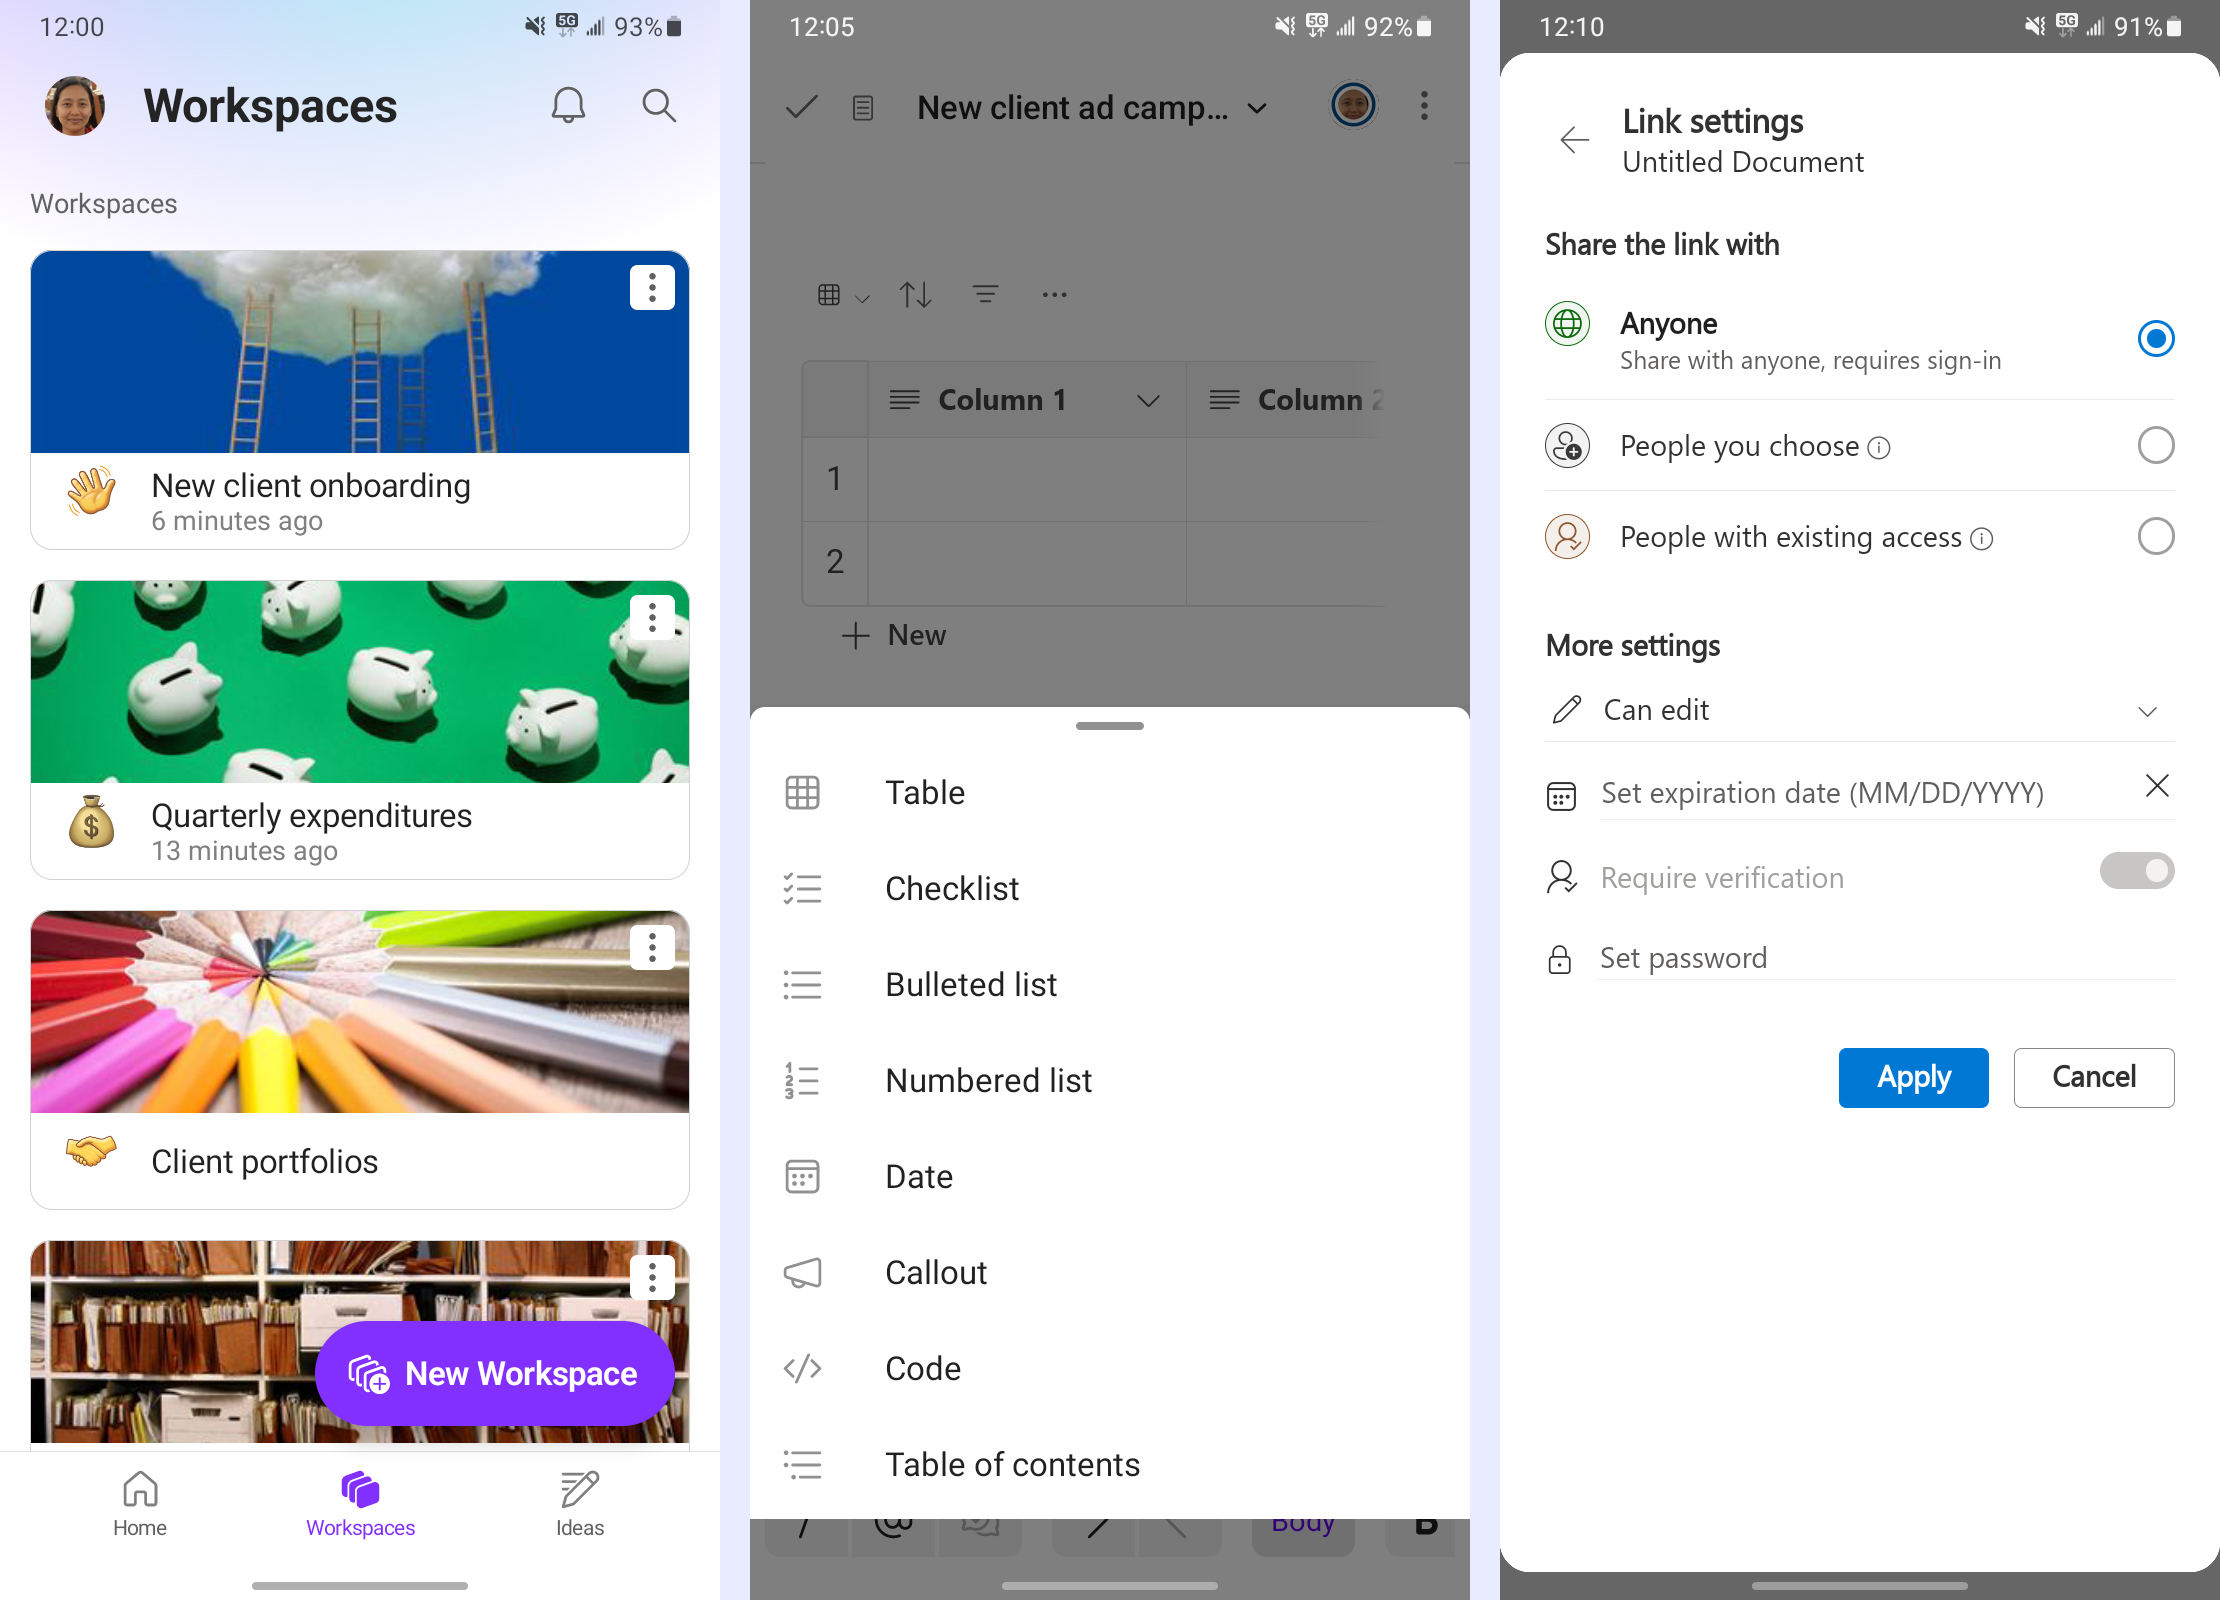
Using the Loop mobile app
The Microsoft Loop mobile app (for Android and iOS devices) has most of the features of the web app. These include creating and editing pages and workspaces, adding elements to pages, and sharing and setting permissions for pages and workspaces.

The Loop mobile app has many of the same capabilities as the web app.
The Loop mobile app has many of the same capabilities as the web app.
Howard Wen / IDG
The Loop mobile app has many of the same capabilities as the web app.
Howard Wen / IDG
Howard Wen / IDG
There are currently a few limitations to both the Android and iOS mobile apps, such as the inability to rearrange pages in a workspace. See Microsoft’s Loop mobile FAQ for details.
This article was originally published in July 2023 and updated in August 2024.